

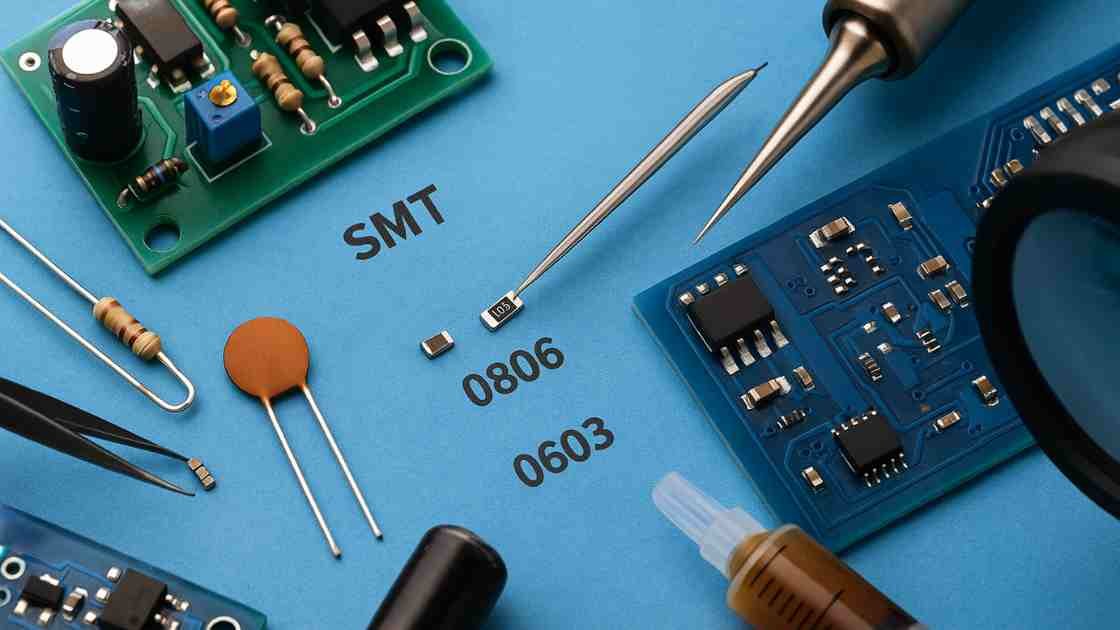
The world of electronics is shrinking. If you’ve dabbled in DIY circuits before, you’ve likely come across the trusty, larger components with long legs that pass “through” the circuit board, what we call Through-Hole Technology (THT). It’s a classic, friendly way to get started. But open up any modern gadget, from your smartphone to your Arduino board or to your 60% Mechanical Keyboard Setup, and you’ll find that the vast majority of parts are tiny, legless, and sit right on the surface. Welcome to the realm of Surface-Mount Technology, or SMT, a necessary skill for any hobbyist looking to prototype or repair contemporary devices.
The jump from THT to SMT can feel intimidating. Those tiny components, sometimes smaller than a grain of rice, seem impossible to handle, let alone solder accurately. However, with the right equipment and a structured approach, SMT soldering is a skill that is entirely within the grasp of the dedicated electronics hobbyist. It’s less about brute force and more about precision, control, and having a good, purpose-built setup.
That’s where the right starter kit comes in. A high-quality SMT soldering kits for hobbyists is more than just a soldering iron; it’s a curated collection of tools and practice materials designed to give you a genuine introduction to this miniature world. We’re going to walk you through everything you need to know, from the absolute must-have tools to the best all-in-one stations, and even some fun, tangible projects you can tackle to build your confidence and expand your maker capabilities.
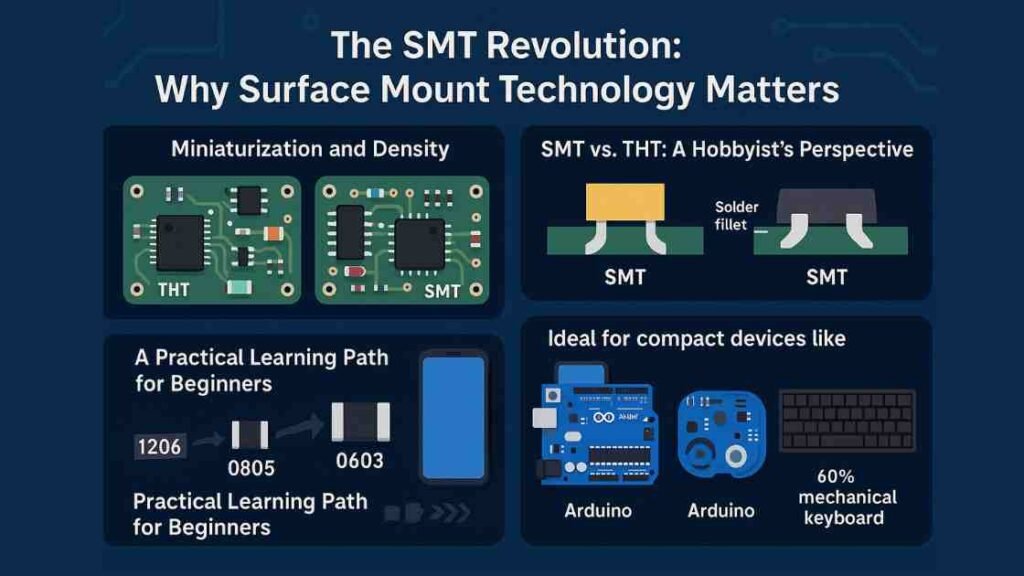
The SMT Revolution: Why Surface Mount Technology Matters
Before diving into the hardware, it’s important to understand *why* SMT has become the dominant method in electronics manufacturing. SMT components (or Surface-Mount Devices/SMDs) are soldered directly onto the pads on the surface of the PCB, rather than having leads inserted through holes. This paradigm shift offers significant benefits that translate directly to the types of projects modern hobbyists want to build.
Miniaturization and Density
The most obvious advantage of SMT is size. Components are drastically smaller and lighter than their THT counterparts, which is why everything from smartwatches to advanced drone electronics is built using SMT. Because no holes are required, SMT allows manufacturers to place components on both sides of a circuit board and pack them much closer together, leading to significantly higher component density.
This is one of the main reasons SMT dominates modern consumer electronics manufacturing. For the hobbyist, this means you can build much smaller, more professional-looking projects, like a miniature data logger or a custom MIDI controller, or even compact devices designed for biometric security such as fingerprint USB drive.
SMT vs. THT: A Hobbyist’s Perspective
While SMT is king in manufacturing, THT still has its place, especially for hobbyist prototyping, due to the sheer mechanical strength of the connections. The leads of THT components pass *through* the board, providing a robust physical bond that is excellent for high-stress applications like large connectors or high-power components.
However, SMT is not always ideal for very high-power, high-voltage, or high-stress mechanical applications. Large transformers, connectors, and power components still rely on Through-Hole Technology for mechanical strength and long-term durability. This is why many professional circuit boards today use a mixed assembly approach (SMT + THT).
Crucially, for beginners, larger THT parts are simply easier to handle and rework, making them the recommended starting point before transitioning to SMT.
A Practical Learning Path for Beginners
For complete beginners, starting with THT components is still the most stress-free way to learn proper soldering heat control, pad wetting, and component handling. Once comfortable, the ideal transition into SMT begins with larger SMD packages such as 1206 and 0805, which are easy to see and position. Only after mastering these should hobbyists move into 0603, 0402, QFN, and fine-pitch IC packages, which require magnification and hot-air reflow techniques. This step-by-step progression prevents frustration and reduces board damage.
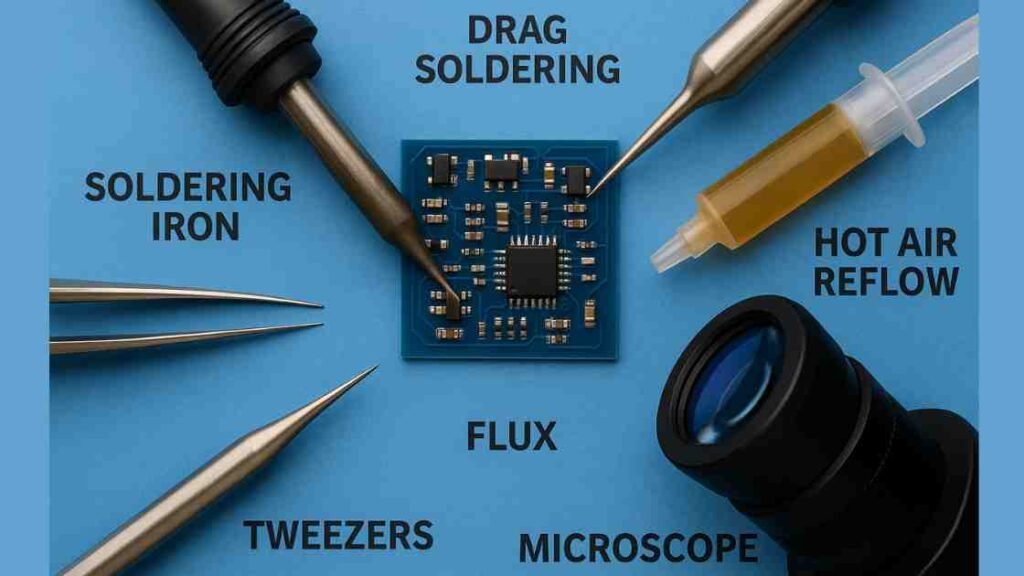
Essential SMT Tools: Beyond the Basic Soldering Iron
Soldering THT components often requires just a decent, temperature-controlled iron and some wire solder. SMT soldering, however, requires a more specialized toolset due to the minute size of the components and the different techniques involved. Your first “kit” should ideally contain these core essentials, or at least leave room in your budget to acquire them.
The Fine-Tipped Iron and Solder
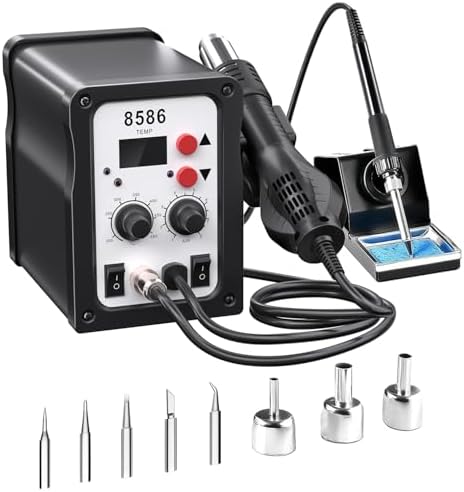
You need an iron with excellent temperature control and a quick heat recovery time, which is why a soldering *station* is highly recommended. For SMT work, the key is the tip: you’ll want a fine tip, often 1mm or smaller, or a specialized bevel/hoof tip for ‘drag soldering’ integrated circuits (ICs). For solder, a thin wire (0.5mm to 0.8mm diameter) with a rosin core is preferable, and many advanced SMT techniques rely on “solder paste” applied with a syringe or stencil, followed by a hot air process.
The Power of Hot Air Rework Stations
While skilled technicians can solder some SMT parts with just an iron, a hot air rework station is a game-changer and is often considered a non-negotiable tool for modern SMT work. This tool delivers a controlled stream of very hot air, allowing you to heat an entire component and all its pads simultaneously. It’s essential for:
- Reflow Soldering: Melting solder paste to connect multi-pin ICs (Integrated Circuits) or components with hidden pads (like QFNs or BGAs).
- Desoldering/Rework: Effortlessly removing a faulty component by heating all its connections at once.
Magnification and Precision Handling
You cannot solder what you cannot see. Because SMT parts can be as small as an 0402 package (1mm x 0.5mm), magnification is critical. A good magnifying lamp or a low-cost digital microscope is highly recommended for placing parts and inspecting solder joints for tiny errors like *solder bridges* (unwanted connections between pads). Coupled with this, a high-quality pair of “precision tweezers” (anti-static/ESD safe is best) is essential for picking up, positioning, and holding the tiny components.
Choosing Your Kit: Comparing Top SMT Soldering Setups
When shopping for “SMT soldering kits for hobbyists,” you will generally encounter two main categories: the “Practice Kit” (just components and a PCB) and the “Tool Kit” (the actual equipment). For a serious start, you’ll need the tools, and a 2-in-1 station that combines a soldering iron and a hot air gun offers the best blend of functionality and value for the dedicated beginner.
The following table compares three common types of setups a hobbyist might consider, from the budget entry point to the high-quality, dedicated iron.
| Kit Type / Model Example | Key Tools Included | Price Range (Estimate) | Best For |
| Budget 2-in-1 Rework Station (e.g., SLI 8586) | Digital Soldering Iron (60W), Hot Air Gun, Swappable Tips/Nozzles, Basic Tweezers, Desoldering Pump. | $60 – $100 | The absolute beginner who wants both hot air and a standard iron on a tight budget. Excellent for practice boards and occasional repairs. |
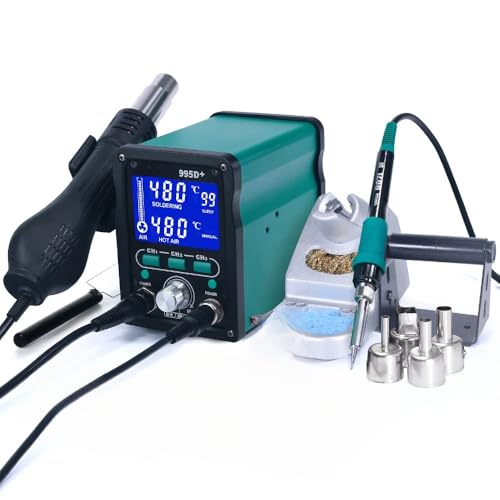
| Advanced 2-in-1 Rework Station (e.g., Yihua 995D+) | High-Power Soldering Iron (75W), Brushless Fan Hot Air Gun, LCD Display, Temperature Memory Presets (CH1/CH2/CH3), IC Extractor, Multiple Nozzles. | $120 – $200 | The dedicated hobbyist moving to complex designs and fine-pitch ICs. The memory presets and better air control simplify repetitive or advanced tasks. |
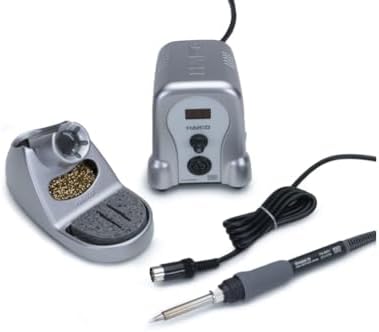
| Dedicated Digital Soldering Station (e.g., Hakko FX-888D) | High-Quality Digital Soldering Iron Station with Iron Stand, Choice of Fine Tips (bevel, chisel), Temperature Control/Calibration. | $100 – $180 (Station only) | Hobbyists focusing on small-scale projects who prefer the precision and reliability of a top-tier contact iron, but who plan to acquire a separate hot air gun later. |


The Practice Makes Perfect: Techniques for SMT Mastery
Moving from soldering chunky through-hole leads to delicate SMT pads requires adopting new techniques. The shift is from soldering a wire *to* a hole, to soldering a component leg *to* a pad on the surface.
The “Solder-and-Tack” Method (For Resistors/Capacitors)
This is the standard hand-soldering approach for two-terminal components like SMT resistors and capacitors, especially package sizes like 0805 or 1206, which are beginner-friendly.
- Tin One Pad:Apply a small blob of solder (called “tinning”) to just one of the component’s pads on the PCB.
- Tack the Component:Using your fine tweezers, hold the SMT component and align it precisely over its pads. While holding it, heat the tinned pad and gently push the component lead into the molten solder. Remove the iron, keeping the tweezers steady until the solder solidifies (“tacking” one side).
- Solder the Second Pad: Now that the component is locked in place, apply a small amount of flux to the second pad, touch your iron to the lead and the pad, and feed a tiny amount of new solder onto the joint to form a smooth fillet.
Drag Soldering (For Multi-Pin ICs)
This technique is a lifesaver for integrated circuits (ICs) with many closely-spaced pins (fine pitch packages) like SOP or SOIC.
- Preparation:Tack one corner pin of the IC to the pad to secure and align it perfectly.
- The Drag:Apply a liberal amount of liquid or gel flux along all the pins on one side.
- The Technique: Load a generous amount of solder onto a large chisel or bevel tip. Drag the tip smoothly along the row of pins, letting the solder flow onto all the pins at once. The flux and the solder’s surface tension will naturally pull the solder onto the pads and off the pins, minimizing bridges. If a bridge does occur, a clean tip or desoldering braid dipped in flux can quickly wick away the excess solder.
The Project Sandbox: Fun SMT Kits to Build Your Skills
The best way to get comfortable with your new SMT kit is by practicing on a tangible project that provides instant feedback. Forget the expensive PCBs for now and start with practice boards or low-cost kits specifically designed for learning.
Practice Boards and Component Variety
Many starter kits include dedicated practice PCBs that feature various component footprints (from the larger 1206 down to the tiny 0402), IC packages (SOIC, QFN), and test points. These are invaluable because they let you focus purely on your technique without worrying about the circuit’s function. By starting with larger components (like 1206 and 0805) and gradually moving to the finer 0603 and 0402 sizes, you can systematically build your precision and confidence.
Beginner-Friendly SMT Projects
Once you’ve mastered the basics of tacking and reflowing, it’s time to create something functional.
Kits that contain a mix of SMT components are an excellent next step:
- LED Blinker Circuit:A simple circuit often based on an SMT 555 timer IC. This project teaches you component placement and soldering while creating a fun, flashing light effect, and is available in many SMT kit versions.
- SMD LED Decorations:Projects like a miniature LED Christmas tree or a flashing keychain are common, beginner-friendly kits that require placing and soldering many small LEDs, often utilizing the 0805 package size.
- Mini Audio Amplifier:An SMT audio amplifier kit, often using an op-amp chip and accompanying passive components, is a great project for introducing you to soldering finer components and working with an application that requires good electrical connections for clear sound output.
Setting Up Your SMT Workbench for Safety and Success
A proper workspace is just as crucial as having the right tools. When working with SMT, precision and a clean, safe environment are paramount.
ESD Protection is Non-Negotiable
Surface-Mount Devices are incredibly sensitive to static electricity. An electrostatic discharge (ESD) can instantly destroy a delicate IC without you even feeling a spark. Your workspace must be safe. Use an anti-static mat on your bench and ensure you wear an “ESD wrist strap” connected to a ground point on your soldering station or a grounded outlet.
Managing Fumes and Clean-Up
Soldering fumes contain particles that should not be inhaled. A basic “fume extractor” fan is a wise investment to pull the fumes away from your face. For cleaning up flux residue—a sticky, brown film that can actually interfere with circuit performance over time—you’ll need “high-purity Isopropyl Alcohol (IPA)” and a small, stiff brush or cotton swabs. Cleanliness is essential for both your health and the longevity of your circuit board.
Troubleshooting Common SMT Mistakes
Everyone makes mistakes in SMT soldering, but recognizing and fixing them is a core part of the learning process.
- 1. Solder Bridges: The most common mistake. This is when solder accidentally connects two adjacent pads or pins.
Fix: Apply fresh flux to the bridge and drag a clean, fine tip (a knife or small chisel tip works well) across the bridge to wick away the excess solder, or use desoldering braid.
- 2. Tombstoning:This occurs almost exclusively with two-terminal components (resistors, capacitors) during reflow. The solder on one pad melts before the other, pulling the component upright like a tiny tombstone.
Fix: If using a soldering iron, apply heat to the side that hasn’t reflowed, and gently push the part down with tweezers while the solder is molten. If using hot air, simply reheat the component until the solder flows and surface tension corrects the position.
- 3. Cold Joint: A dull, lumpy, or grainy solder joint that didn’t flow properly, indicating poor electrical and mechanical connection.
Fix: Apply a tiny bit of fresh flux to the joint, and briefly touch the hot, tinned iron tip to the joint until the solder becomes shiny and flows smoothly.
The Future is Small: Moving to Advanced Components
Once you’ve mastered the passive components and basic IC packages like SOIC, the next challenge in your SMT journey involves working with the smallest and most complex parts. Moving into components like 0402 packages or quad-flat no-lead (QFN) integrated circuits will require you to rely heavily on advanced tools and techniques.
QFN packages, for example, have pads underneath the component, making them impossible to solder with a traditional iron. This is where your “hot air rework station” becomes indispensable, combined with “solder paste” and a “solder stencil”. The stencil is a thin sheet of metal or plastic placed over the PCB, allowing you to quickly and precisely squeegee solder paste onto all the pads at once. After placing the components with tweezers, the entire board is heated with hot air, and the surface tension of the molten solder pulls the components into perfect alignment—a technique known as reflow. Embracing these techniques is the final step in truly bridging the gap between hobbyist and professional electronics assembly.
Frequently Asked Questions (FAQs)
1. What is the smallest SMT component a hobbyist can realistically hand-solder?
Realistically, most hobbyists can achieve good results hand-soldering down to the 0603 component package size, which measures about 1.6mm by 0.8mm. The slightly larger 0805 and 1206 packages are excellent starting points for a beginner, as they provide a good balance between component size and ease of handling. While 0402 components are increasingly common in commercial electronics, they are very challenging for hand-soldering and typically require a high-magnification microscope and specialized tools. It is recommended to start with larger packages and gradually size down as your skill improves to avoid frustration.
2. Is a hot air station truly necessary for beginner SMT soldering?
While you can certainly get started with an excellent fine-tipped iron and some practice boards for simple components like two-terminal resistors and capacitors (1206, 0805), a hot air station becomes necessary very quickly as you progress. Components with multiple, fine-pitch pins or those with pads hidden underneath the package (like QFN and BGA) are virtually impossible to solder or desolder correctly without a hot air tool. If your goal is to repair modern electronics or build projects with complex chips, a 2-in-1 hot air and soldering station is the most practical and versatile investment.
3. What is the recommended temperature range for SMT soldering?
The recommended temperature for SMT soldering typically falls between 280°C and 350°C (536°F and 662°F), depending on the type of solder being used. For lead-free solder, which has a higher melting point, a temperature in the 320°C to 350°C range is often required to ensure good flow and quick heat transfer. Crucially, you should aim to keep the contact time on the joint under three seconds, as excessive heat or prolonged exposure can damage the delicate SMT component or even lift the copper pads from the PCB.
4. How important is flux, and what type should I use for SMT?
Flux is extremely important in SMT soldering, arguably more so than with THT, because of the small size and high density of the pads. It cleans the metal surfaces by preventing oxidation and allows the molten solder to flow smoothly and efficiently, which helps prevent solder bridges on fine-pitch components. For SMT work, a no-clean liquid flux applied via a flux pen or a gel flux applied with a small syringe is ideal for precision application. Just remember to use high-purity Isopropyl Alcohol (IPA) to clean off any remaining residue after the joint has cooled.
5. Can I use a basic pencil iron if I just switch to a fine tip?
A basic, un-regulated pencil iron is generally not recommended for SMT, even with a fine tip, as the lack of temperature control poses significant risks to miniature components. SMT components are highly susceptible to damage from overheating, and a simple pencil iron’s temperature can fluctuate wildly or run excessively hot. A dedicated soldering station with a digital temperature controller is the minimum recommended tool. These stations maintain a consistent, precise temperature, which is essential for reliably creating clean, reliable solder joints without causing thermal damage to the board or components.
6. Where can I find schematics and documentation for SMT practice kits?
The availability and quality of documentation for SMT practice kits can vary significantly, especially for lower-cost, unbranded kits, which sometimes come with little to no documentation. It is best to purchase kits from reputable vendors who explicitly provide a full Bill of Materials (BOM), a clear schematic, and a step-by-step assembly guide. When using kits with poor documentation, online electronics forums and community sites often become excellent resources where other hobbyists have shared their own assembled schematics and component reference guides to help troubleshoot.
Your Journey to SMT Mastery: The Future is Small, and You’re Ready
The transition to Surface-Mount Technology is an inevitable and exciting step for any electronics hobbyist looking to keep pace with the modern world of miniature, powerful devices. While the thought of soldering components the size of a poppy seed may seem daunting, the secret to success lies almost entirely in acquiring the right tools and patiently practicing the correct techniques. A budget-friendly, yet capable, “2-in-1 hot air rework station”—like one of the many models offered by brands such as Yihua—provides the most versatile starting point, arming you with both the contact iron for general work and the essential hot air for delicate ICs and reflow soldering.
Once you have your essential kit (the iron, hot air, fine tips, and precision tweezers), the most critical next step is to invest in a low-cost SMT practice board. By starting with larger components (1206, 0805), mastering the simple ‘solder-and-tack’ method, and graduating to fun project kits like the LED blinkers, you will quickly find that SMT soldering is a skill based on precision and rhythm, not just a steady hand. Embrace the learning curve, prioritize your ESD safety, and within a few practice sessions, you’ll unlock a whole new dimension of DIY electronics, ready to tackle any modern circuit board.
External References & Further Reading:
Surface-Mount Technology vs Through-Hole Technology Explained
Aimtron Electronics https://www.aimtron.com/blog/surface-mount-smt-vs-through-hole-tht-choosing-the-right-pcb-assembly-technology
Advantages and Disadvantages of Surface-Mount Technology (SMT)
ProtoExpress https://www.protoexpress.com/blog/good-not-so-good-sides-surface-mount-technology
SMT Assembly vs Through-Hole: What to Know
MacroFab https://www.macrofab.com/blog/smt-assembly-vs-through-hole
Difference Between SMD and Through-Hole Components
Viasion Technology https://www.viasion.com/blog/difference-between-smd-and-through-hole-components


